Next I shielded the control cavity. I had a fairly large piece of adhesive copper sheet. Next time, I'm just going to buy several feet of copper tape and cover it with overlapping strips. It should be much easier that way. I tried to cut slots on the edges to allow me to stick it in place. It kind of worked but I'd recommend doing it some other way. This was a pain, and the end result is pretty poor.
Mounted the pots, bridges, tuners, and output jack. I think that's all pretty self explanitory.
For the pickups, I got a chunk of black foam from some packaging material at work. I cut a piece for each pickup, fed the pickup wires through to the control cavity, and put the pickups in on top of the foam and then screwed them down.
Next I installed the strap buttons. I got Dunlop Straploks, which I'm quite happy with. I knew that this bass is going to end up neck heavy, so I offset the back strap button a few inches. I'm not sure how much it helps, but it certainly doesn't hurt.
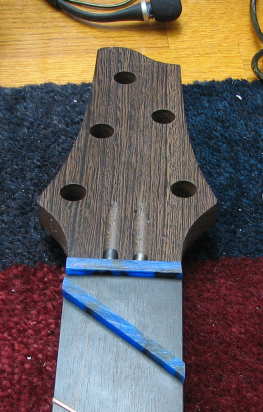
I then made the nuts. I actually used 2. Because this was a pre-built neck the fretboard was cut square. I was either going to have to sand down the top edge of the fretboard, cut grooves in it, or add a nut to hold the strings just above the surface. It seems to be working for now, but the nut still seeds some tweaking. so there is still the possibility that I'll end up cutting string slots on the end of the fretboard to get a better break angle over the nut. (Update: I've been playing it the way it is for a few weeks. The d string buzzes because it's not cut properly, but no need to slot the board. I just need to make a better nut)
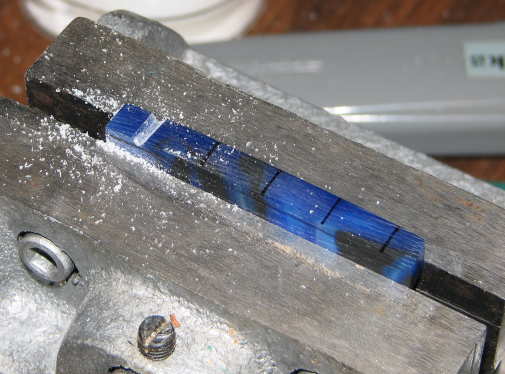
I cut the slots to depth with a hacksaw blade, and then rounded them out starting with some small files, and finishing by using drill bits like a file. It's a bit hard on the fingers, but I wasn't going to spend the money to buy a proper set of gauged files, and I've got a large drill index, so I can get the gauges pretty precise.
I did a crappy job of it, so I didn't bother gluing it down, It does seem to be working reasonably well though, in spite of the angle of the slots being imperfect. The D string has a bit of a buzz when you play it open. I'll be redoing this in the near future.
Finally I did the wiring. I used an unconventional layout which allows me to connect each wire of the pickup to one of three points (Output, ground, or a 3rd floating terminal) This way I can put the pickups in any combination. Series, Parallel, Out of phase Series/Parallel, and if I want to solo a pickup I can even decide whether the other one is left open or shorted. I put two pots on each pickup, one in series, and one in parallel, with both outputs going through a final pot for the master volume. This way I have control over either pickup in all configurations. The downside of the scheme is that there are many control adjustments that will give no sound, or just cause a lot of hum. IMO the versatility is really cool, but most people would like something simpler. ;)
(Update: I'm one of those people. I really don't mess with the knobs much. It's cool, but I won't bother next time around. Also, the series pots need to be a much lower value. Duh.)
I got some Dingwall strings, which are just barely long enough, and gave it a try. It sounded awesome, but the first few frets were quite sharp, and I got a really weird beating sound on the lower strings when I played around the 12th fret.
Filing the nut thinner took care of the sharpness. I lowered the polepieces under and around the bass strings, and lowered the neck pickup a bit. That has mostly solved the beating. I could probably reduce it to completely undetectable by lowering it some more, but I like the really hot output it has, and can tolerate the subtle vibrato that remains.
As it stands, I need to redo the nut(s) and do a cavity cover, but it's close enough to finished for this page.